
Manual Instruction
3 Ways to Fixate Farra Eye Model

Fixate with pins on styrofoam
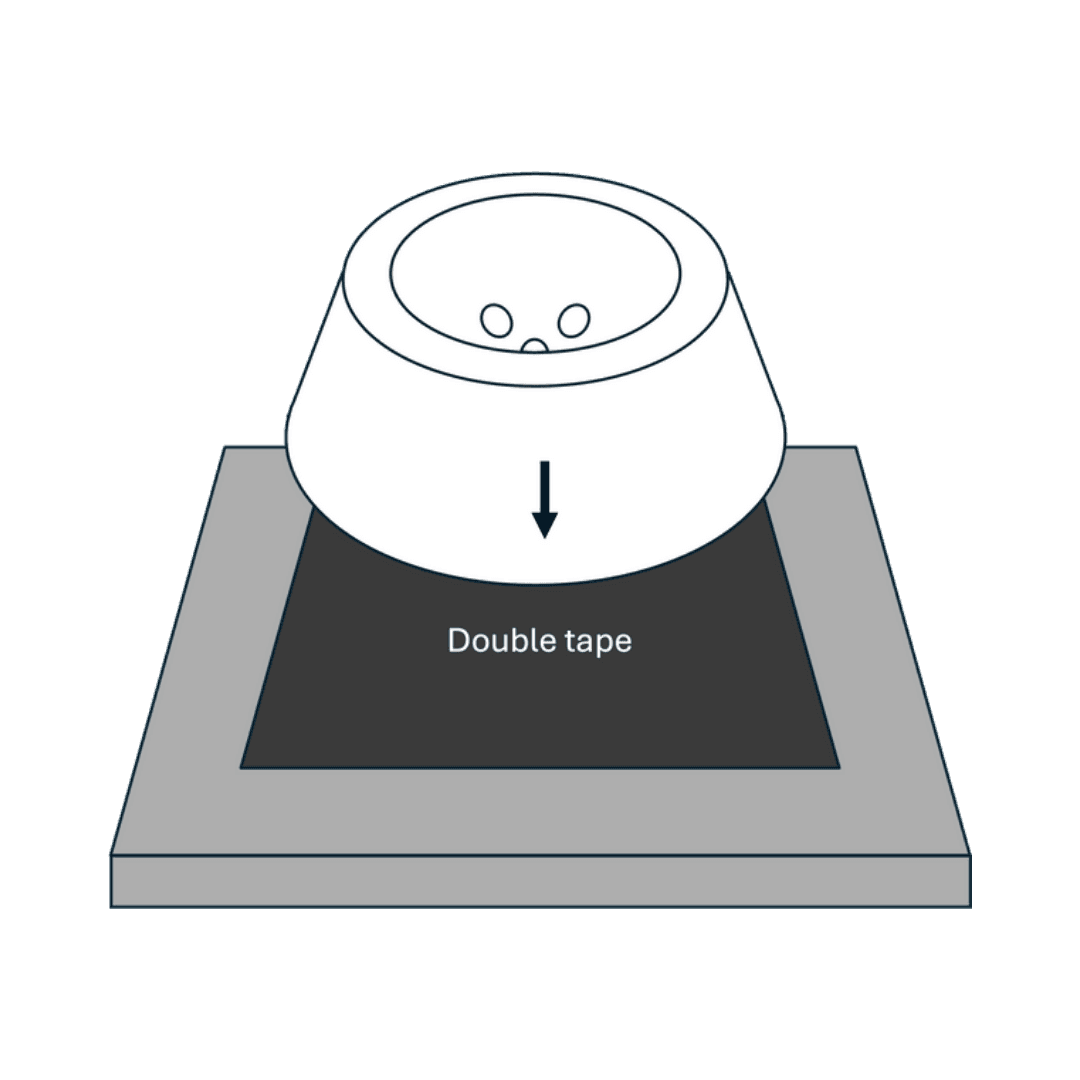
Fixate with double tape on a flat surface
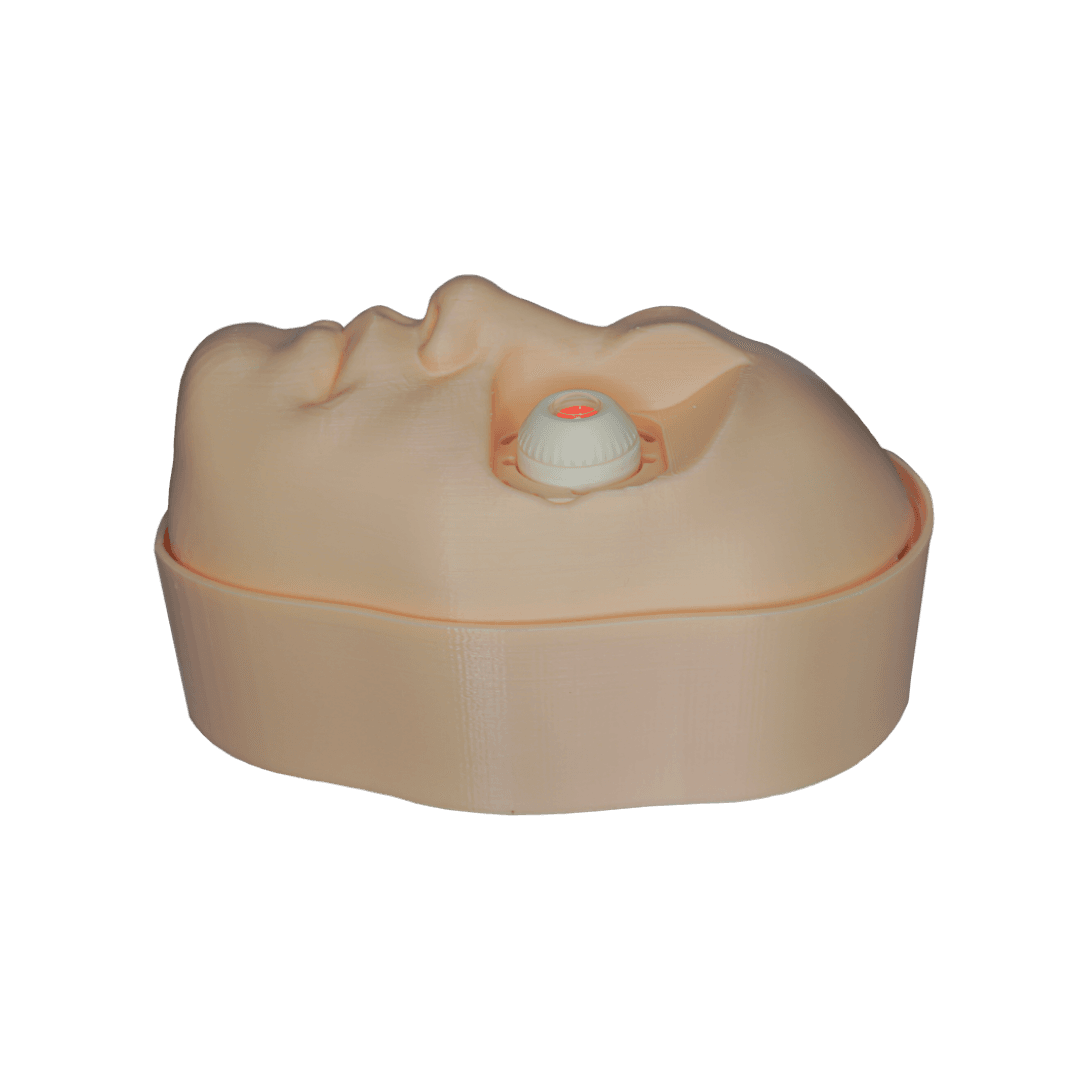
Fixate with Farra Face Model
Instructions for General Use
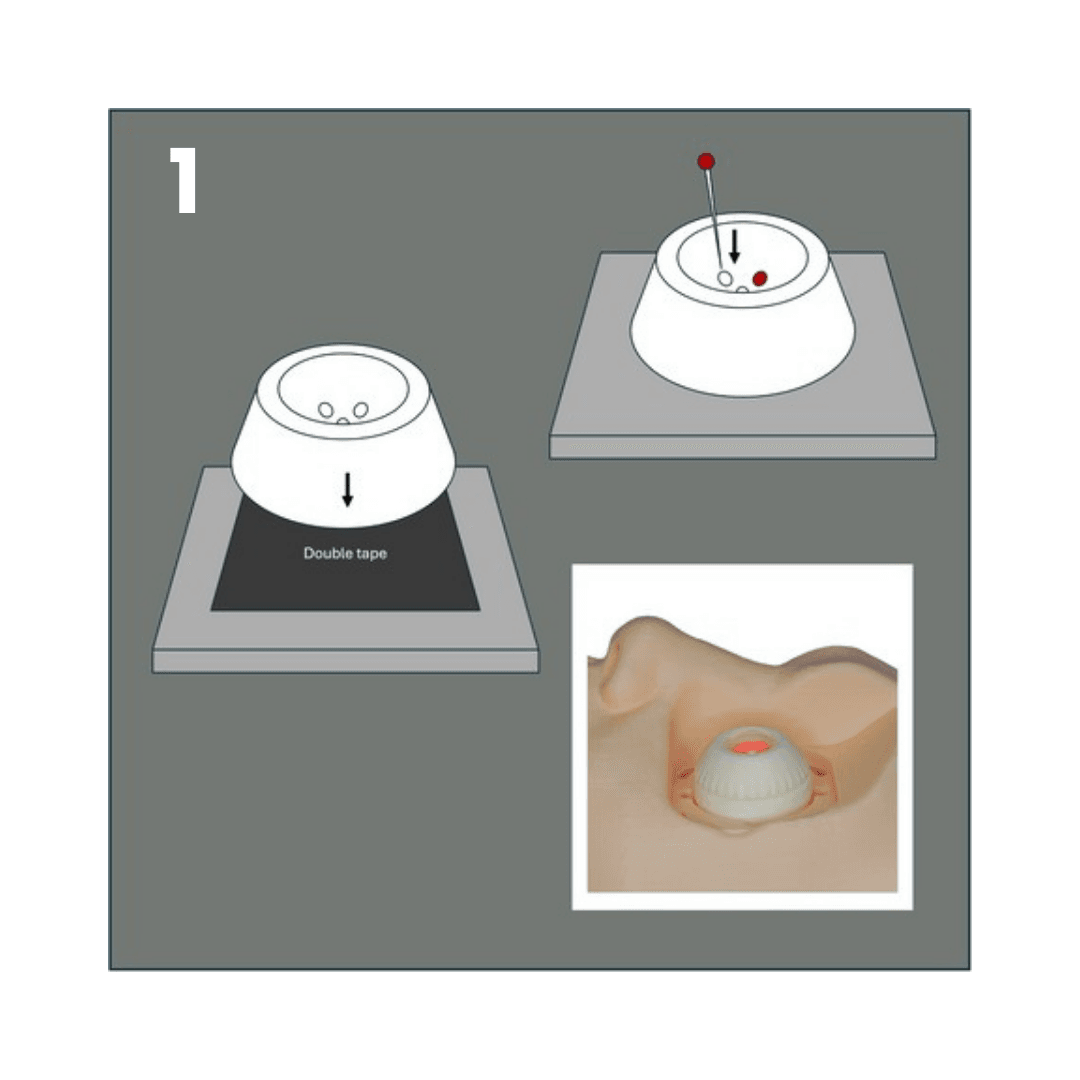
Fixate the Farra base on a flat surface with double tape or a styrofoam board with pins, or using Farra Face Model.
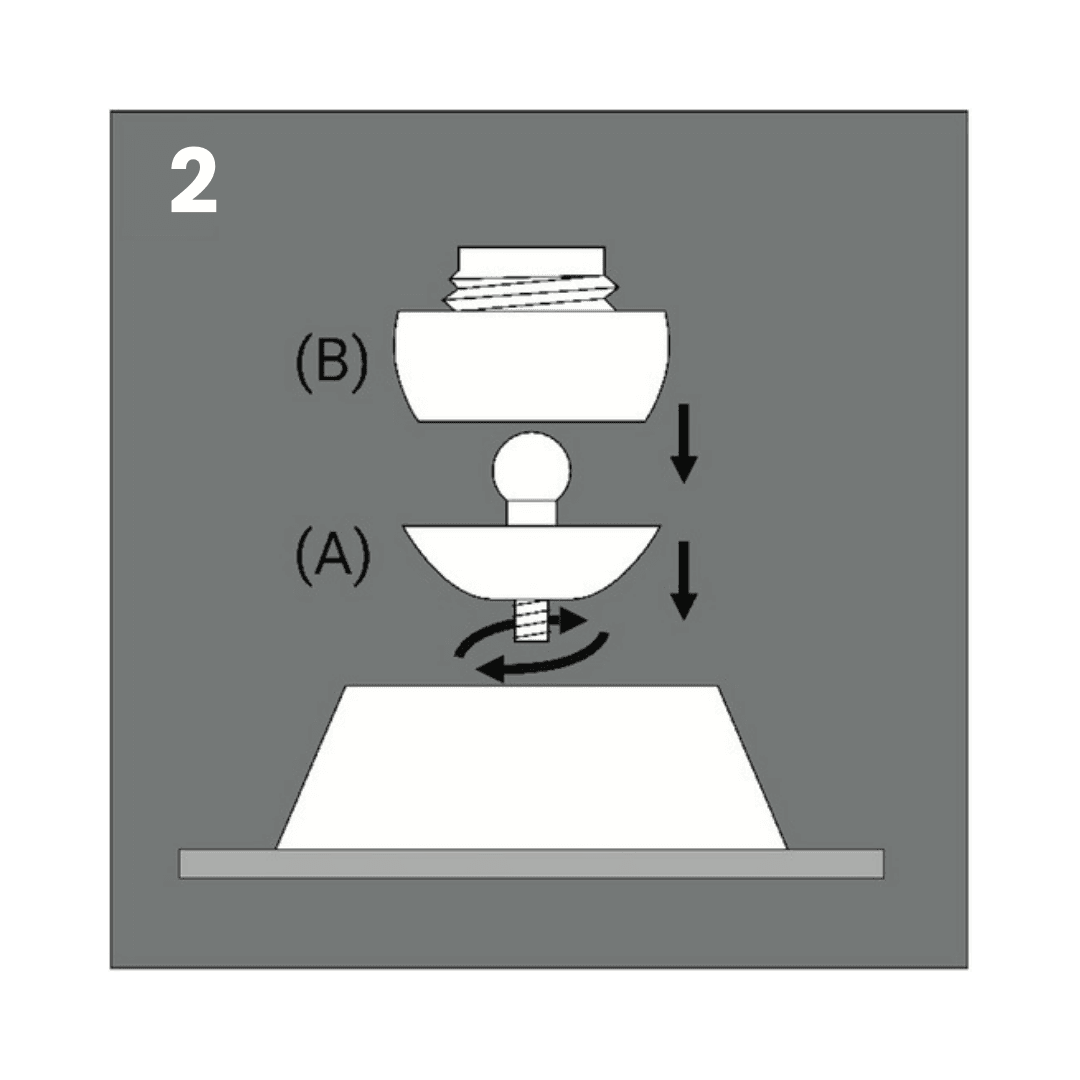
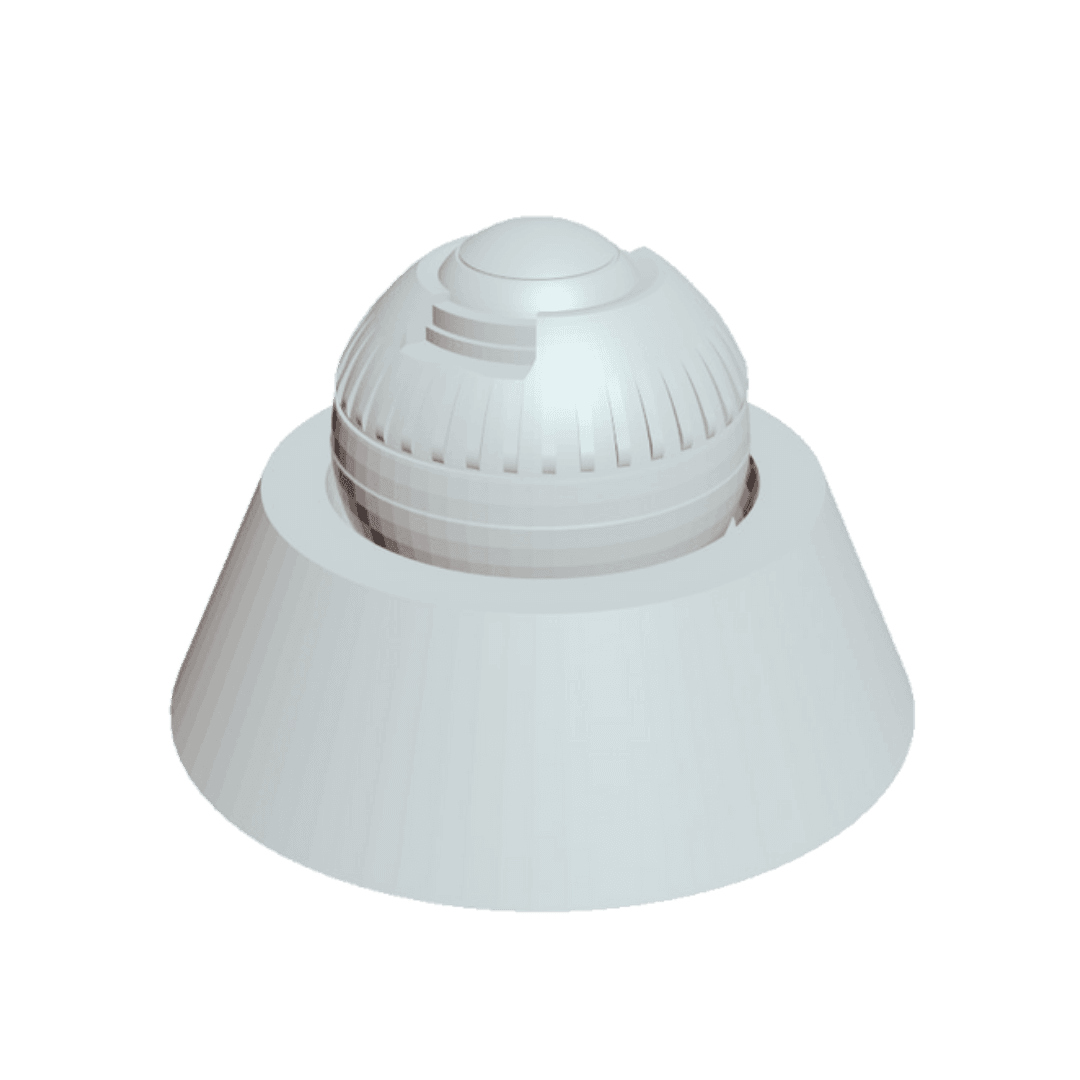
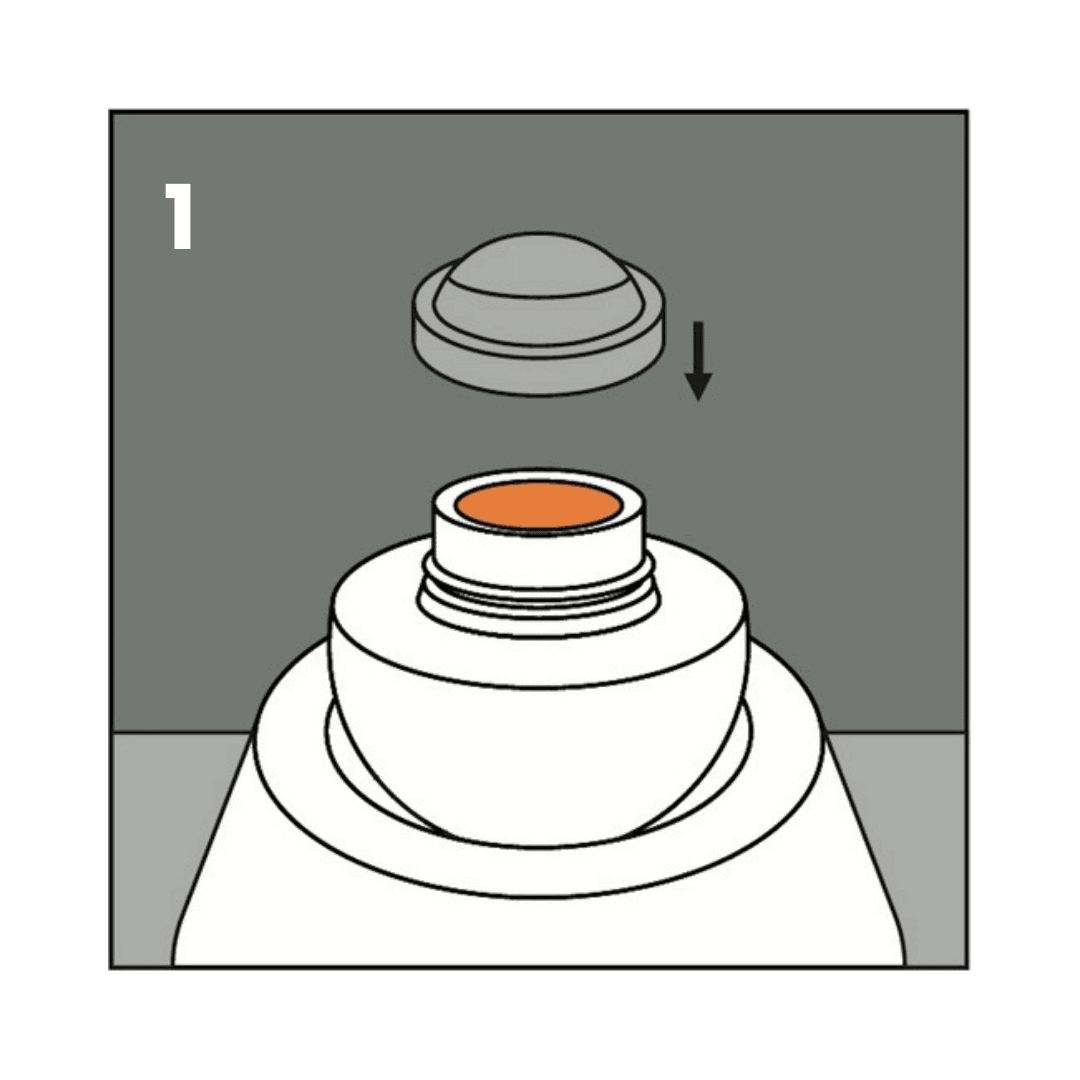
Install the silicon screw bar (A) on the Farra base screw bar hole, then install the Farra body (B) on the screw bar stub.

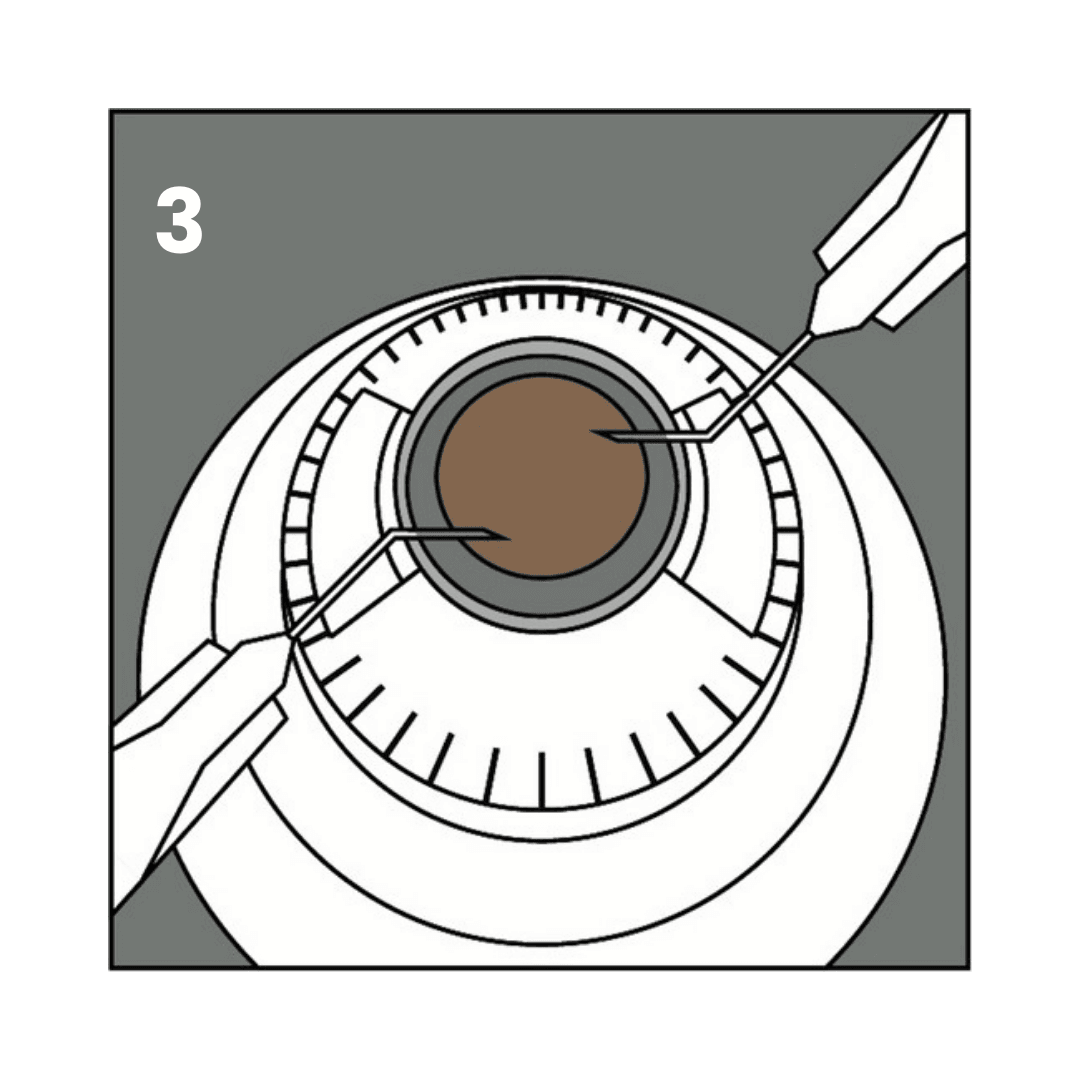
Take an adequate of plasticine clay or Farra nucleus and place it on the orange-concave part until it forms the desired convexity of the lens.
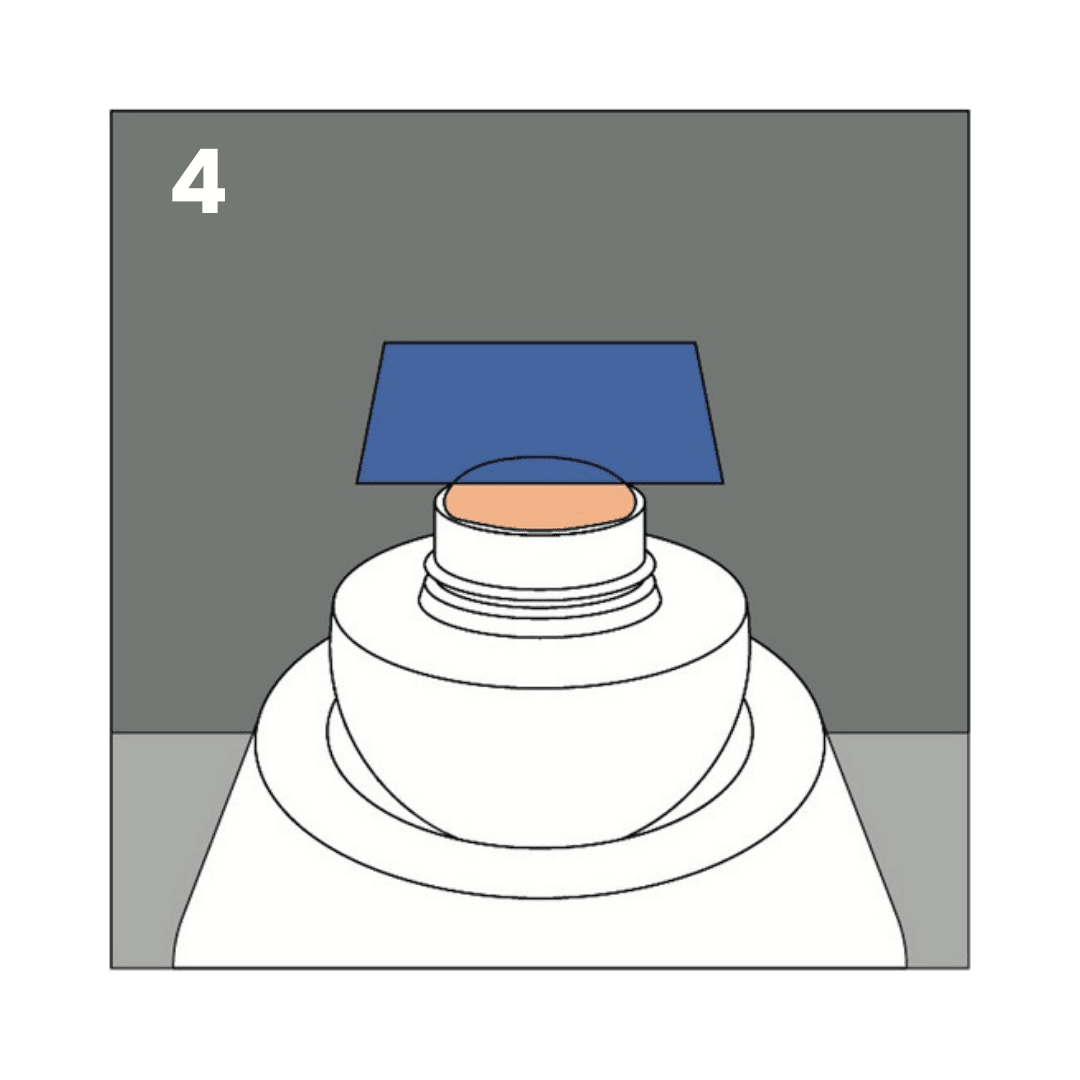
Place a lens capsule layer on top of the Farra nucleus.
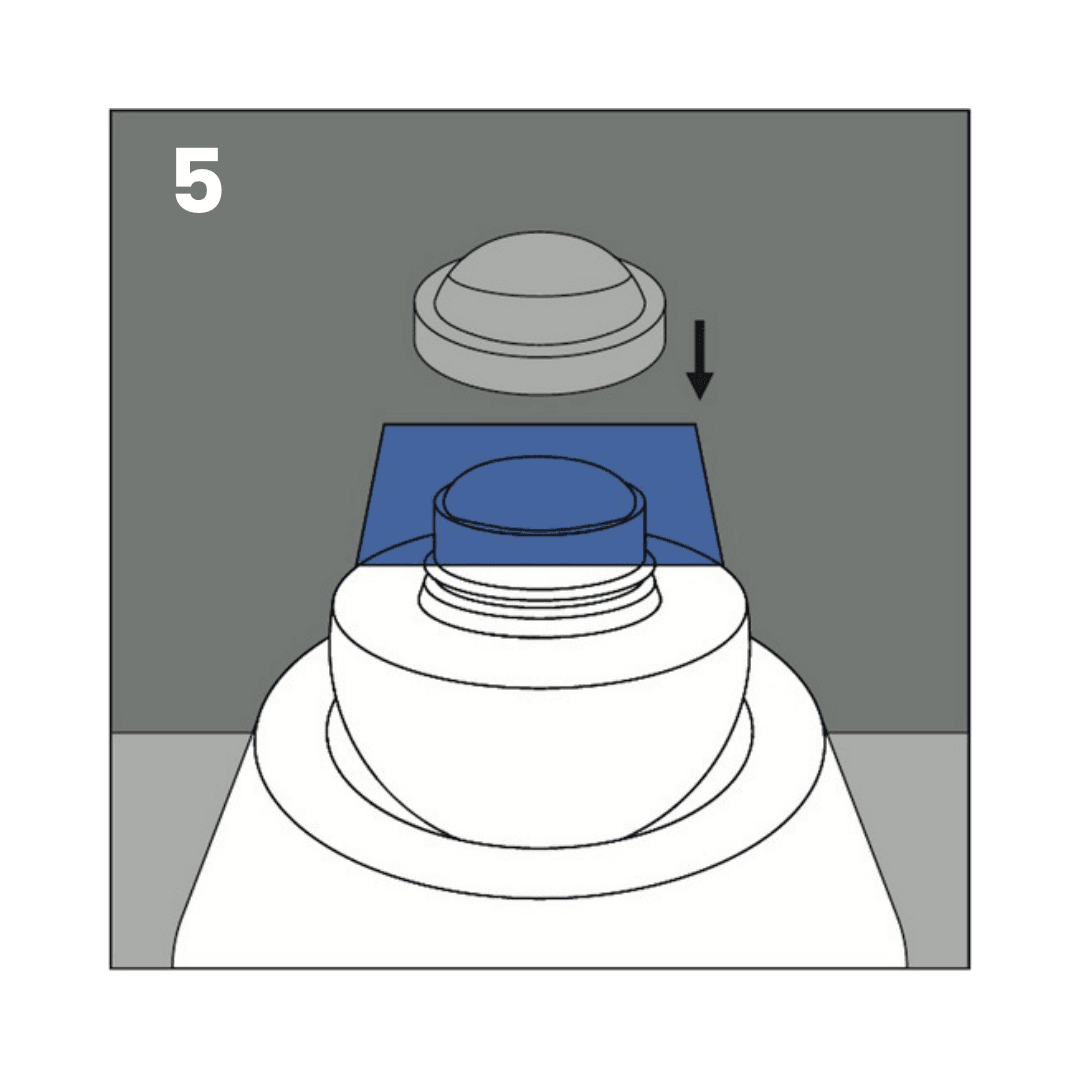
Place the artificial cornea on top of the lens capsule layer.
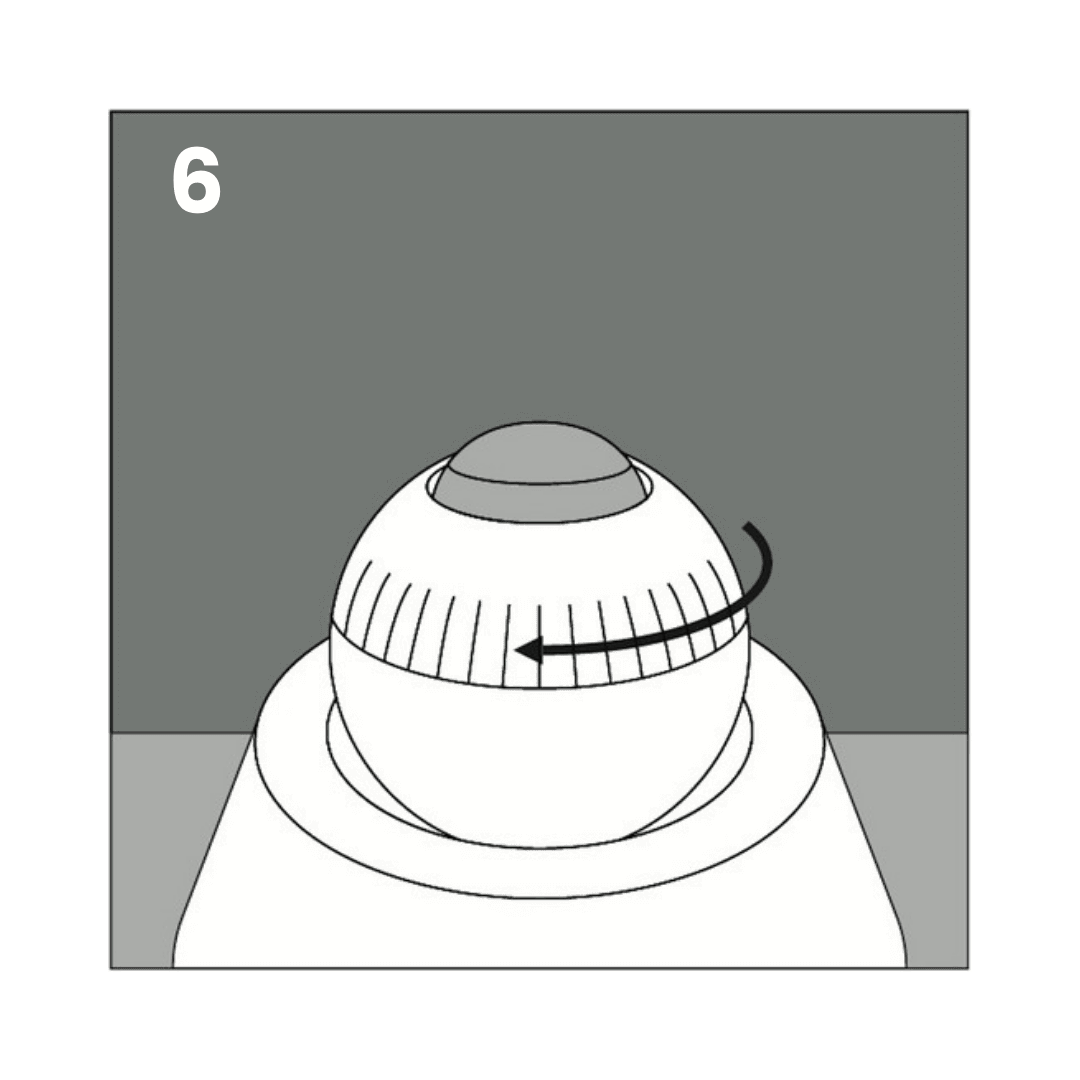
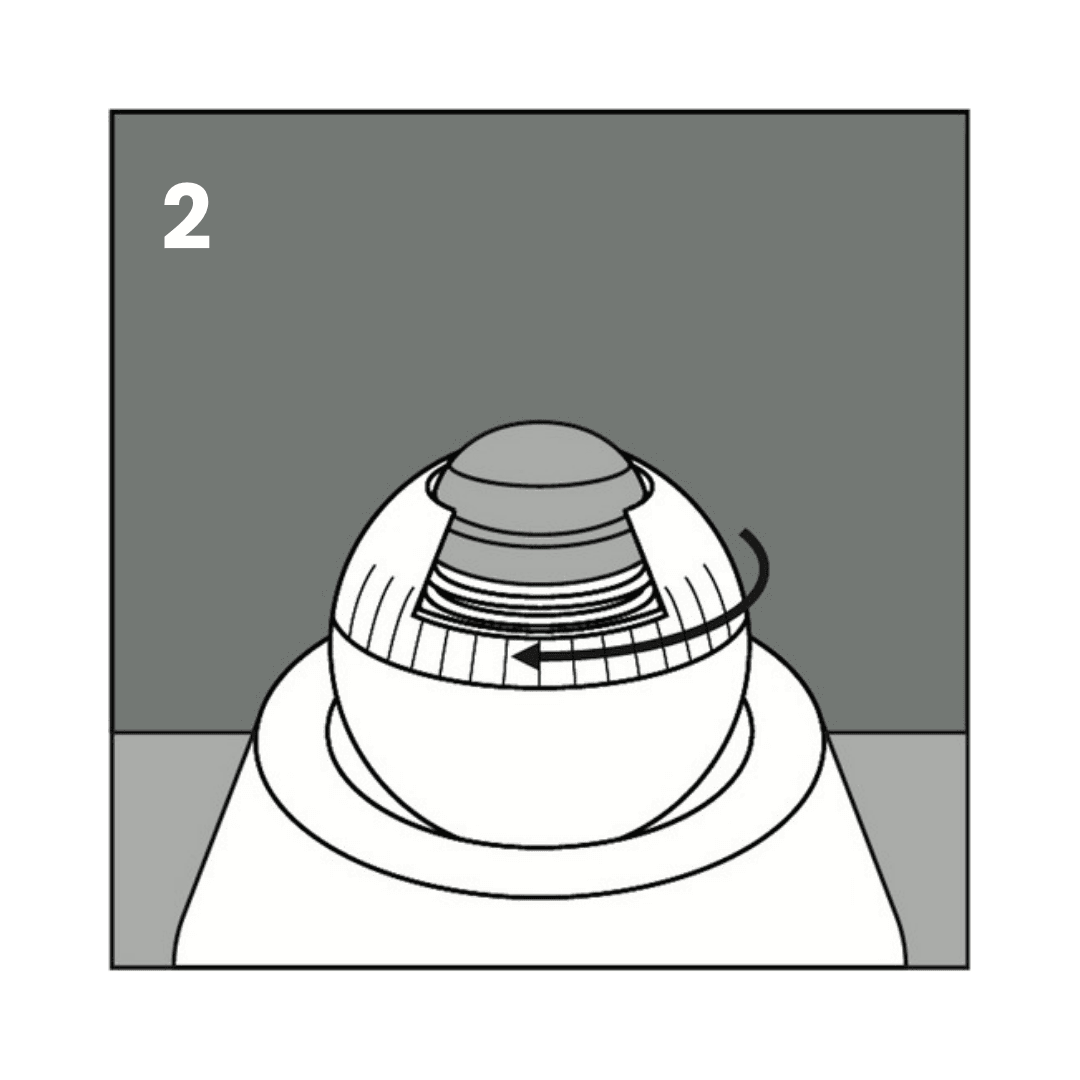
Place Farra’s upper body on the artificial cornea then rotate it to tighten.
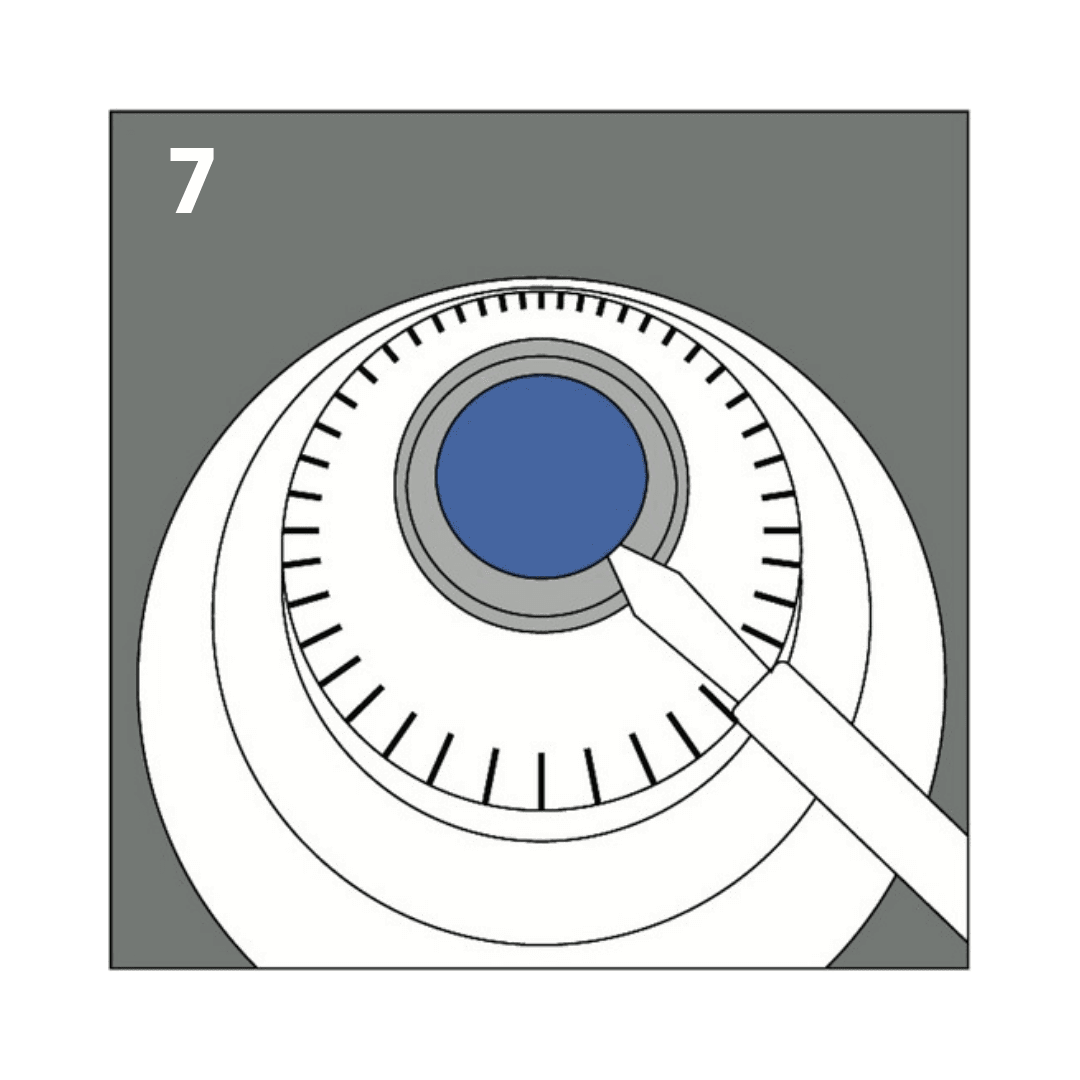
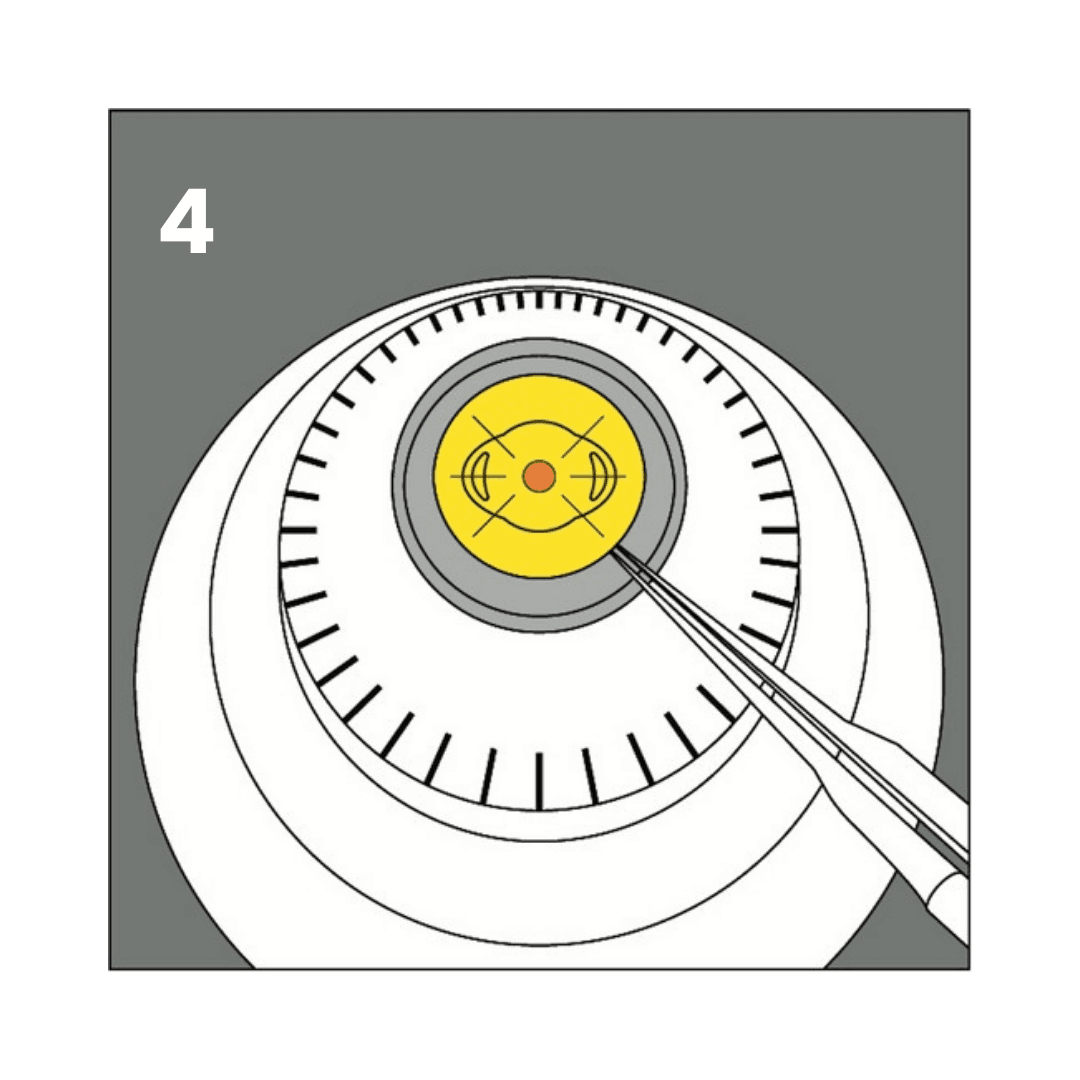
Make an incision in the groove (simulated corneal limbal area) of the artificial cornea.

Insert the training instrument through the incision hole that has been made.
Instructions for Iris claw IOL Implantation
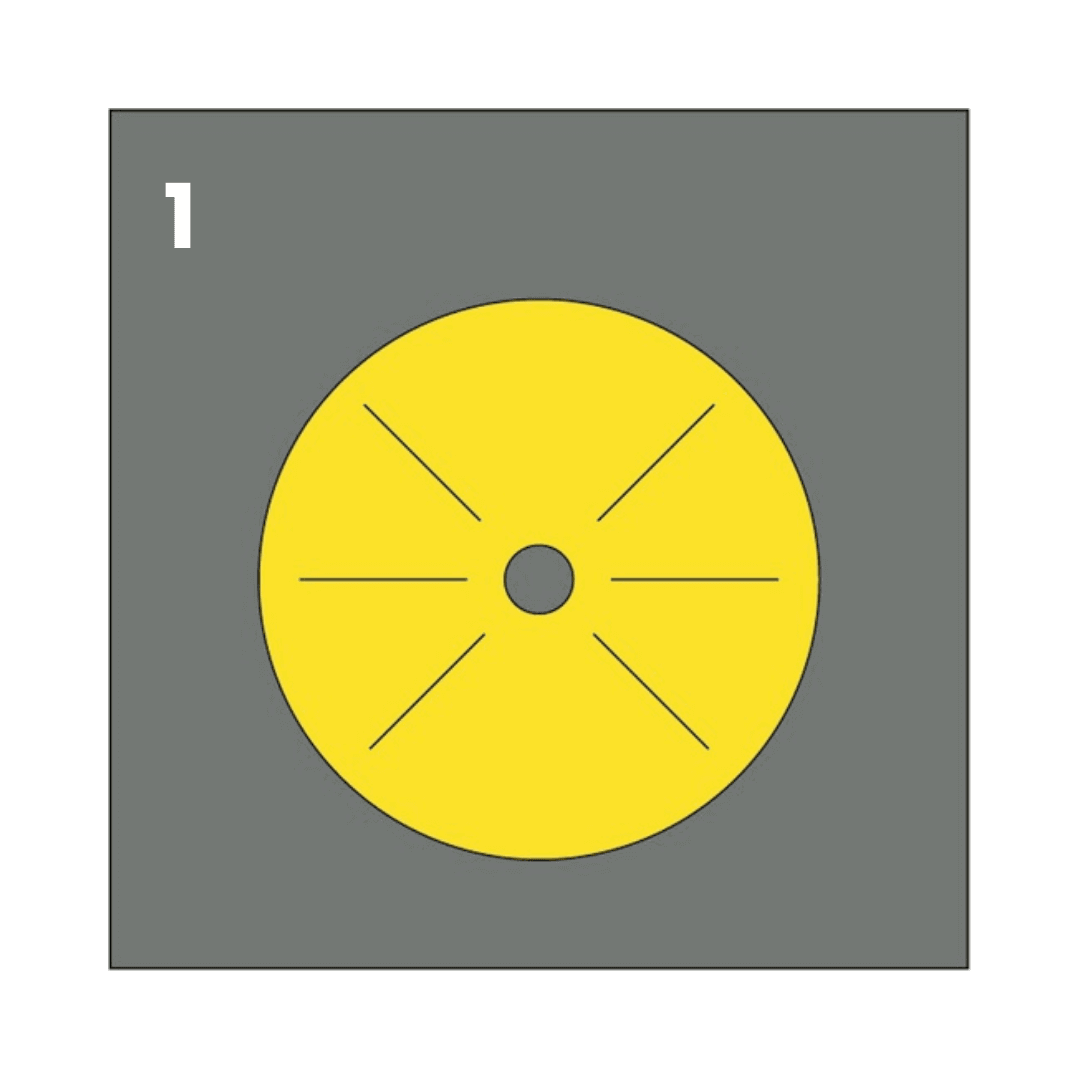
Prepare the artificial iris to be enclaved by making an incision on 6 locations as demonstrated above.
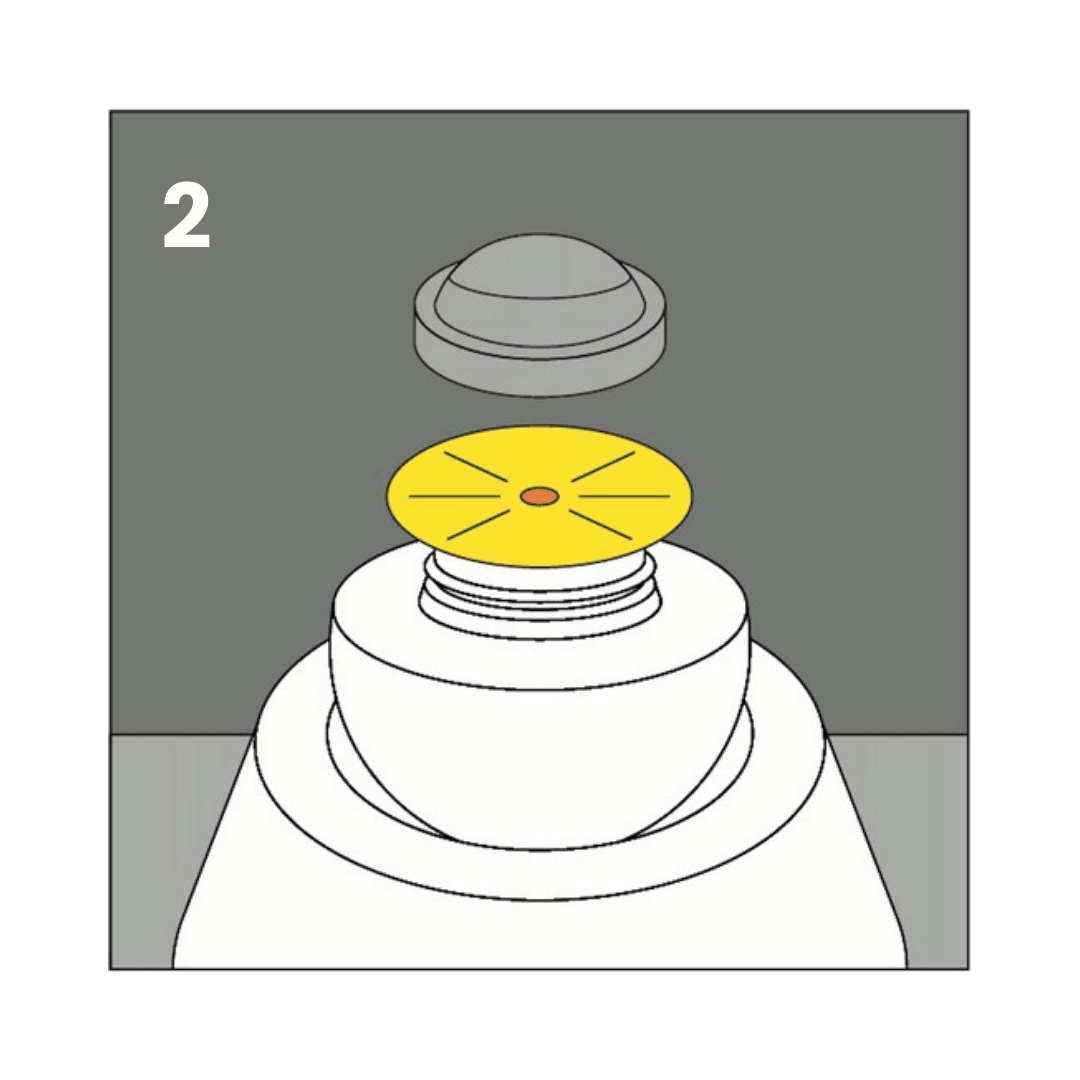
Place the artificial iris on top of the concave part, and place the artificial cornea over the iris part.
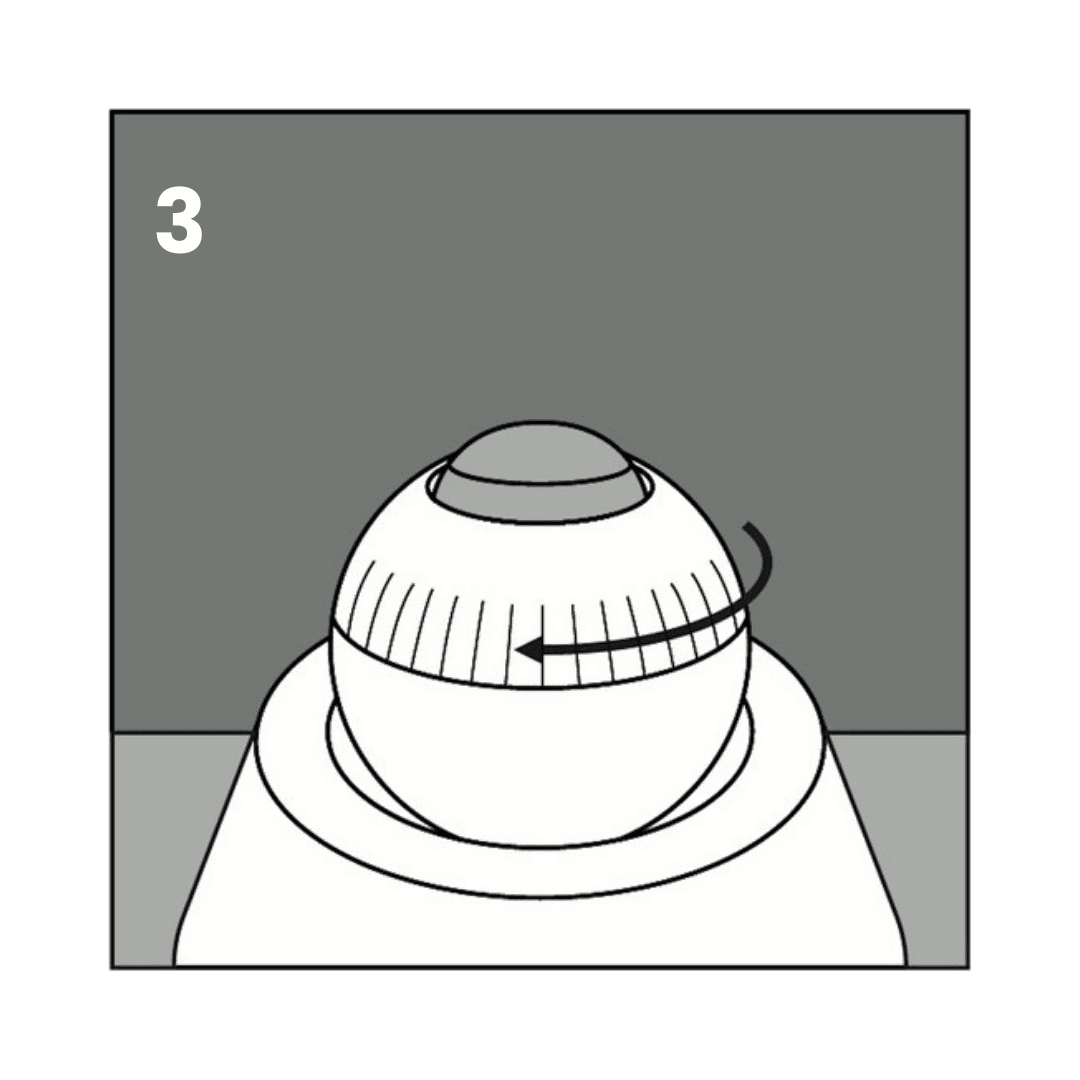
Place Farra’s upper body (regular model) on the artificial cornea then rotate it to tighten.
Insert the training instrument through the incision hole that has been made.
Instructions for Scleral Fixated IOL Implantation (Yamane)
Place the artificial cornea silicone directly above the orange- concave part. (can also be inserted by artifical iris before).
Place Farra’s upper body (Yamane model) on the artificial cornea, then rotate it to tighten.
Make a corneal incision with a keratome. Yamane needle can be inserted 2 mm from the groove (simulated corneal limbus) to perform scleral penetration.
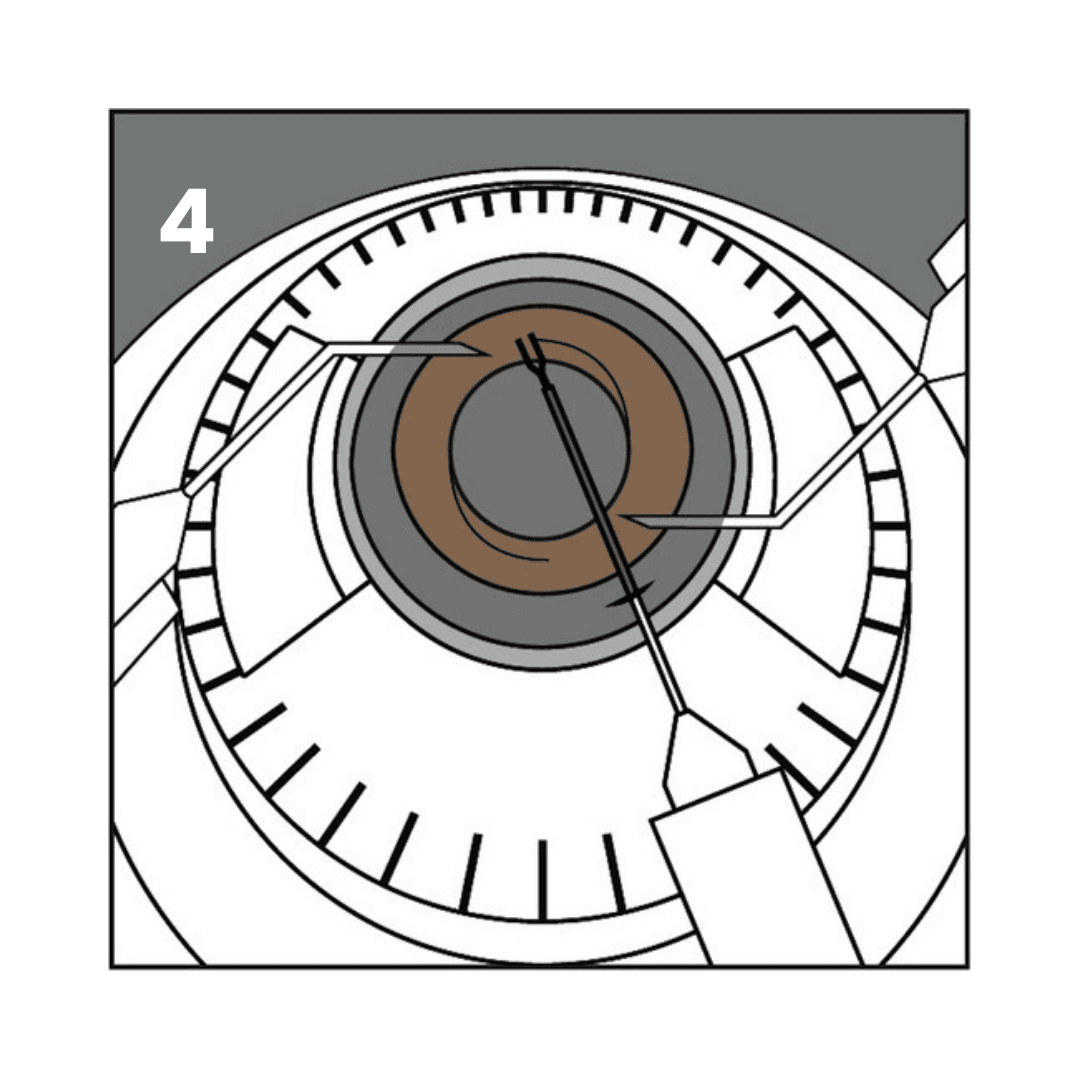
Insert the training instrument through the incision hole that has been made to perform Yamane procedure with 3-piece IOL and micro forceps.